
How to Replace Kitchen Floor: Ultimate DIY Guide

Replacing the kitchen floor can be a daunting task, but with the right guidance and tools, it can be a satisfying and rewarding project. A new kitchen floor can completely transform the look and feel of your space, giving it a fresh and updated appearance. Whether you’re looking to replace an old, worn-out floor or simply want to upgrade the style of your kitchen, this step-by-step guide will help you through the process.
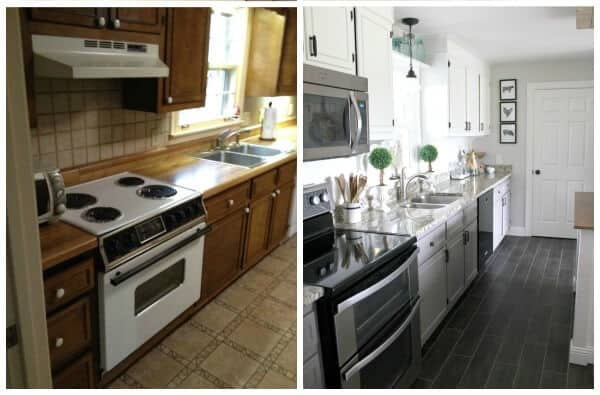
Credit: notinggrace.com
Step 1: Choose the Right Flooring Material
Before you begin replacing your kitchen floor, you need to decide on the right flooring material for your space. There are several options to choose from, including hardwood, laminate, vinyl, tile, and linoleum. Consider factors such as durability, maintenance, style, and budget when making your decision.
Hardwood flooring is a popular choice for kitchens due to its timeless appeal and durability. Laminate and vinyl flooring are affordable options that mimic the look of hardwood and are easy to clean. Tile flooring offers a wide range of design possibilities, while linoleum is known for its eco-friendly properties.
Step 2: Prepare the Kitchen
Before you start removing the old floor, it’s important to prepare your kitchen for the replacement process. Clear out all furniture, appliances, and any other items that may obstruct your work area. Remove baseboards and trim, and disconnect any appliances that are attached to the floor, such as dishwashers and refrigerators.
Next, turn off the power to any electrical outlets in the kitchen and cover them with tape to prevent dust and debris from entering. Additionally, make sure to wear protective gear such as safety goggles, gloves, and a dust mask to keep yourself safe during the project.
Step 3: Remove the Old Flooring
The next step is to remove the old flooring. The process will vary depending on the type of flooring you have. If you have carpet or linoleum, you can simply pull it up. However, if you have tile or hardwood flooring, you may need to use a pry bar or chisel to carefully remove it.
Be cautious when removing the flooring to avoid damaging the subfloor. Use a scraper or putty knife to remove any adhesive residue left behind. Sweep or vacuum the floor to ensure it’s free of any debris before proceeding to the next step.
Step 4: Prepare the Subfloor
Once the old flooring has been removed, it’s time to prepare the subfloor. Inspect the subfloor for any signs of damage or rot. Repair any issues before proceeding. If the subfloor is in good condition, clean it thoroughly to remove any dirt or dust.
If you’re installing hardwood or laminate flooring, you may need to install a moisture barrier to prevent moisture from seeping into the subfloor. This will help prolong the life of your new floor and prevent any potential damage.

Credit: www.prolinerangehoods.com
Step 5: Install the New Flooring
Now it’s time to install the new flooring. Follow the manufacturer’s instructions for your chosen flooring material. Start by laying down the first row, ensuring it’s straight and aligned with the walls. Use spacers to maintain an even gap between the flooring and the walls.
If you’re installing tile or vinyl flooring, you’ll need to apply adhesive to the subfloor before laying down the tiles. For hardwood or laminate flooring, you may need to use a nail gun or adhesive to secure the planks in place.
Continue installing the flooring row by row, making sure each piece is properly aligned and secured. Use a rubber mallet and a tapping block to ensure a snug fit. Trim the last row if necessary to fit the space.
Step 6: Finishing Touches
Once the new flooring is installed, it’s time to add the finishing touches. Install new baseboards and trim to cover any gaps between the flooring and the walls. Caulk any visible seams or joints to create a seamless look.
Give the floor a thorough cleaning to remove any dust or debris. Depending on the type of flooring you chose, you may need to apply a sealant or polish to protect and enhance its appearance.
Step 7: Enjoy Your New Kitchen Floor
Congratulations! You have successfully replaced your kitchen floor. Take a moment to admire your hard work and enjoy your newly transformed space. A new kitchen floor can make a significant difference in the overall look and feel of your kitchen, adding value and beauty to your home.
Remember to properly maintain your new floor by following the manufacturer’s guidelines for cleaning and care. Regular sweeping and mopping will help keep your floor looking its best for years to come.
Replacing your kitchen floor is a rewarding project that can enhance the functionality and aesthetics of your space. With careful planning and execution, you can achieve a beautiful and durable kitchen floor that will stand the test of time. So, roll up your sleeves, gather your tools, and get ready to transform your kitchen!
Frequently Asked Questions
How To Prepare The Kitchen Floor For Replacement?
To prepare the kitchen floor for replacement, remove appliances and furniture, then clean and level the subfloor.
What Are The Best Flooring Options For Kitchens?
Popular kitchen flooring options include tile, hardwood, laminate, and vinyl for their durability and water resistance.
What Tools Are Needed To Replace A Kitchen Floor?
Essential tools for replacing a kitchen floor include a pry bar, hammer, utility knife, tape measure, and a flooring nailer.
How Long Does It Take To Replace A Kitchen Floor?
The duration to replace a kitchen floor varies, but it typically takes 2-5 days depending on the size and type of flooring.


